Google Website Translator Gadget

Sunday, 19 February 2012

My Little 3-Card Burr Saga

Quite a while ago now I was sent a copy of George Miller's 3-Card Burr as a gift from Wil Strijbos. I had an idea of how it went together as I had seen a few copies in other people's collections in the past, however I also knew that it had a rather interesting quirk to it. Once the puzzle has been assembled into it's final burr state it will not be able to come apart again without the cards being destroyed in the process.

Scott Elliott phrased the process involved much more eloquently than I would've in a comment on his blog, so I'll just add it here:
"The one-way feature elegantly balances topology against the limitations of the cards' material properties. You must put the cards under a great deal of stress to assemble the puzzle, but the cards work together to keep that stress under control until you reach a fully-assembled equilibrium. Once it's assembled you can't go back because neighboring cards resist the movement instead of assisting it; the force required to overcome the resistance would exceed the material strength of the cards."
I was worried that there could be a real chance that I could screw up the assembly of this puzzle, and as such destroy it completely. So with this in mind I did something which even I consider to be very sad; I decided to keep the puzzle unsolved until I worked up the courage to put it together.

3-Card Burr DIY Attempt
Because I really wanted to know if I could assemble the puzzle, I asked fellow blogger Allard if he would mind sending me a rough diagram of the cuts needed  so that I could make a copy for myself that I wouldn't mind if I screwed up a few times. He kindly obliged and thus my DIY attempt at the 3-Card Burr was born!
It was made from a cheap set of plastic playing cards that I had lying around. All it took was a few vague guessed at measurements, some pen lines and a scalpel and the job was done. The fit -to put it nicely- is not amazing, but it does work! And for me that was the main thing.

Quite some time passed from this point, and I was content that I had sort of solved this puzzle with my DIY attempt, and this negated the fact that I owned a perfectly solvable puzzle that was still in it's original packaging. During this time I was entering into a rather unusual puzzle exchange with Scott Elliott for a copy of a puzzle that he owned but wasn't particularly attached to (more on that later).

Now I say that this was a rather unusual puzzle exchange because neither myself nor Scott had properly exchanged a puzzle before, so this was new territory for both of us. Somewhere along the line I had mentioned to Scott that I owned an unsolved copy of the 3-Card Burr, and he saw this for the shame that it was. So to add an interesting twist to our puzzle exchange he imposed an 'unconventional stipulation' on my 3-Card Burr. As part of this exchange I was required to properly assemble my copy of this puzzle!

3-Card Burr PVC Practice Copies
Although Scott had put forward this unconventional stipulation, he is not a cruel person. To compensate for this unusual condition (not that he had to of course) he very kindly said that he would send me a couple of PVC samples to practise on that he would make up using his awesome 3D printer. These PVC copies could stand a little bit more force than the card version, so they would be perfect for me to practice on before putting together the real thing. I put these together using the same method I applied to my DIY version, and they went together no problem. I even took them apart again, which is something that cannot be done with the card version, showing that there is indeed more 'give' in the PVC.

Now that the warm up was complete I had no real excuse to hold back any more. I unwrapped George Miller's 3-Card Burr from it's shrink wrap packet and proceeded to put it together.

George Miller's 3-Card Burr
I had a bit of a scare during the assembly process when one of the cards got caught up and had begun to bend a little bit too much, but luckily this was easily corrected with a bit of gentle prying. The tolerances were so tight that I have no problem believing that this puzzle will never be able to come apart again, but now that I have it together I'm not bothered by that in the slightest.

Scott was right, you really do have to put this together and see it for yourself to really appreciate it, and I'm actually very glad that he decided to bring this unconventional stipulation into our already unconventional puzzle exchange.

And here they all are together, my little 3-Card Burr family:
My 3-Card Burr Family
A big thanks to Scott for pushing me into eventually doing the right thing. And also to Allard for his help in making my DIY attempt possible.

Friday, 3 February 2012

V-Cube 7 - Illusion

I solved my first 'twisty' puzzle!!! And no, I'm not counting the time when I pried apart my childhood Rubik's Cube.

Okay, so that may not be a very big deal to many of you, but I've always had huge problems whenever it comes to solving two particular types of puzzles. One half of those are puzzles of the wire 'disentanglement' variety, and the others are of the 'twisty' variety.

Recently I came across a range of puzzles by the Greek twisty puzzle manufacturer V-Cubes (or Verdes Innovations if you prefer). These were twisty cubes of the 7x7x7 variety as opposed to the Rubik's Cube 3x3x3, but were only composed of two colours. The puzzles in this series are called V-Cube 7 - Illusion, and are considered to be a good starting point for anyone looking to get into twisty puzzles, like me! Not that I need to get into any other puzzle varieties mind you...it just sort of happened this way.

Just by looking at the picture it doesn't actually look as though the cube can be scrambled as each side is perfectly identical. However one side has a reverse checker-board pattern, and this is the side that you scramble into all of the others. Thus the puzzle is to essentially solve the one irregular side of the cube, and then all of the other sides will automatically be solved as well.

I have to admit, due to some kind of fear that I have developed against twisty puzzles it took a good few hours before the cube was scrambled properly. I kept doing a couple of turns and then putting it back again. I hated the idea that I may never be able to get it back to it's starting position again. To solve this dilemma I gave the cube to my other half, who although has no interest in solving puzzles did actually take quite a keen interest in scrambling this one. Personally I think she just likes to see me suffer.

I worked out a good method in my head for solving this cube. I started by finding the only centre cube that was a different colour, and then started solving it from the inner pieces outward. Then I got the edge centres in place, followed by the rest of the edge pieces. The corners did not need solving as in this puzzle they are all of the same colour. Getting the edge pieces right actually took longer than all of the others as I had to keep the solved pieces in position whilst bringing them into place, which is much harder than it looks!

It actually only took me about 30-40 minutes to solve this the first time, and each time I did it afterwards I became quicker as I was picking up the methods needed to solve it.
Now I don't think that I'm anywhere near the stage of picking up a proper 7x7x7 with six different coloured sides, but I will be much less afraid of giving many other twisty puzzles a go from now.

The quality of the V-Cube - Illusion is really nice! The cube feels weighty, turns perfectly and hardly ever catches. They are available in four different colour patterns (yellow/black, white/black, red/white, green/white) and they currently retail for around 30 Euro (or 40 USD). I bought mine directly from the V-Cube Online Store.

Sunday, 22 January 2012

Impossibly Impossible Jars

As I may have mentioned before, I'm also getting very interested in 'impossible objects'. These are not exactly mechanical puzzles in the sense that they cannot be physically solved, the real challenge is to work out how they were created. Most people just want to know how it was done, whereas I much prefer coming up with all manner of ridiculous theories, and I'm quite happy to never be told the truth.

Here are a couple of 'object in glass' impossibilities that I got hold of recently:

Golf Ball In A Jar - Jared Brzenski
This is a standard glass jam jar containing an ordinary (and used) 'Noodle' brand golf ball. From the picture the size of the opening looks big enough for the ball to pass through, but that wouldn't make it very interesting. In reality the ball is a fraction too large to pass back through the opening, and as such it seems that it will remained forever sealed inside. This jar was made by Jared Brzenski who sold this creation through his Etsy shop. They are well worth a look.

Spicy - Impossible Bottles
This jar looks a little more exotic with it's wooden lid. It was once an old spice jar, and you can even still smell the spice when you open it. There is a padlock inside which is firmly attached to the wooden lid with a metal hook. The key is also attached to the same hook. You can pull the lid up about an inch, but the padlock will not pass through the neck of the jar. The padlock will still function perfectly well, but only if you can manage to get the key into the keyhole.

Now I do know how this is made as I have seen a similar implementation before, so I actually disassembled it just for kicks.
This jar was made and sold by the English site Impossible Bottles, who also have a range of several other incredible (and impossible) creations for sale for some very reasonable prices. Apparently you can even supply them with your own standard glass bottles, and then they will make them more impossible for you. Very clever!

Wednesday, 18 January 2012

Midlands Puzzle Party No.5 (MPP5)

It's almost time for the next Midlands Puzzle Party (MPP) to take place!

For those of you who didn't hear about these yet, they are a series of very casual gatherings in the UK where puzzle enthusiasts, collectors, designers etc. can get together and essentially sit and puzzle for a whole day in like-minded company.....with light refreshments!

I wrote about my experience of the first one HERE, and a great account of each of the previous events can also be found on Allard's Blog: (MPP1, MPP2, MPP3, MPP4)

The next one will be the 5th MPP gathering since February of last year, and it will be this coming March. Here are the full details:

MPP5 - Saturday 17th of March 2012
10:00 to 18:00

The Gap
39 Oakwood Grove,
Warwick
CV34 5TD
UK

As the previous MPPs were turning out to be quite popular it was decided that this social club would be hired for the event instead. So for the first time attendees will be asked to pay £5 toward the cost of hiring the club. Any money left over will be used for the light refreshments mentioned earlier.

A discussion of the event and list of confirmed and possible attendees can be found HERE.

Monday, 9 January 2012

Jigsaw Cube

I've seen this puzzle around quite a few times, but as it was always going for quite a high price I never got around to buying it. However a little while ago I found one being sold second hand on eBay for a significantly reduced price, and I thought I'd buy it and see what it's really like.

This puzzle is generally referred to as the 'Jigsaw Cube', and it seems to be manufactured and sold by various different companies, including Eureka and Inform Designs. That probably accounts for why it can be found in quite a few puzzle shops.

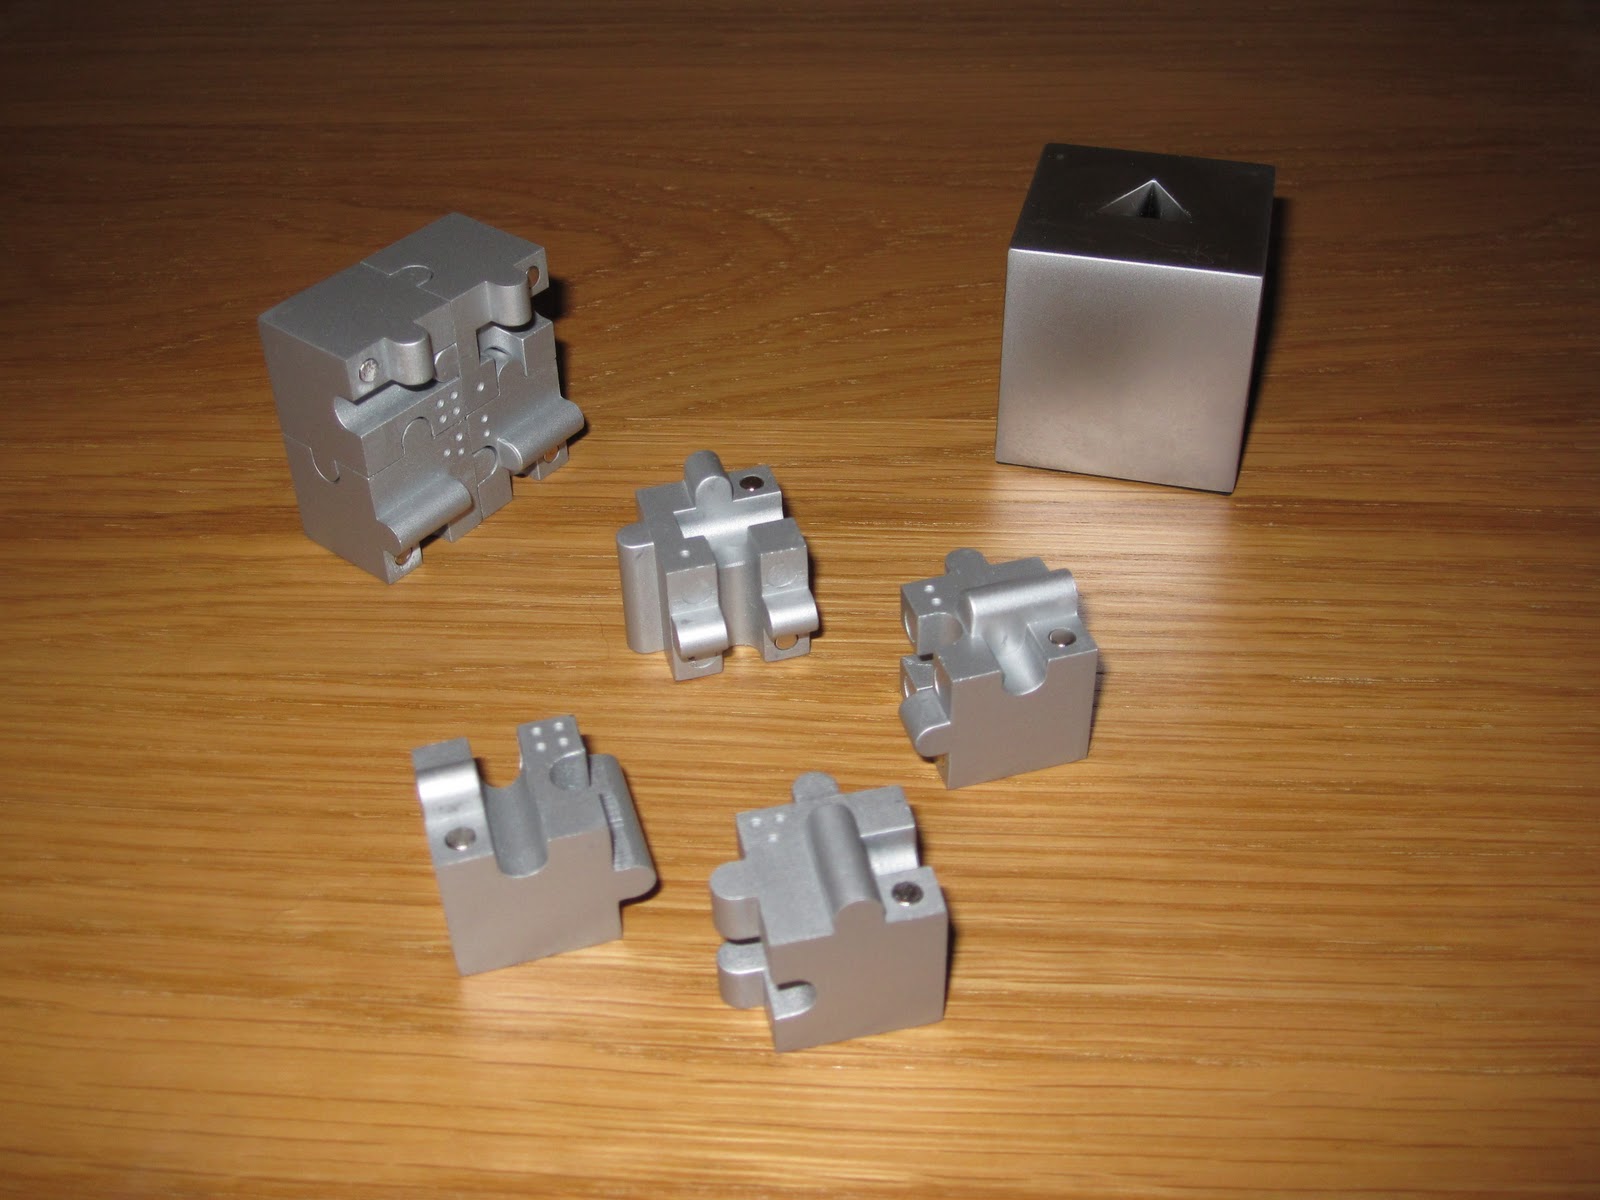
Although it is not possible to tell from the pictures, the cube is made up four pairs of pieces, or eight in total. Each of these pieces have inlaid magnets, and as such can only join onto another piece if the magnets attract and the 'jigsaw' cut pieces fit together.

It's also hard to get across the size, weight and build quality of the Jigsaw Cube, and that's the reason that I didn't want to risk buying one for the full price. Now that I've held one and seen it up close I am extremely impressed with the quality of both the metal and the way the magnets have been laid into the individual pieces. The fit and finish is perfect.

The cube measures in at 3.6cm (obviously not including the stand), and as it's made from solid metal and decent rare earth magnets it has a pretty hefty weight to it for it's size.

As a puzzle it's not very difficult, and this is due to a couple of reasons. Firstly; the pieces are made in pairs, so it's easy to tell that the solution requires you to make two identical halves. Secondly; the pieces are numbered internally, which is very unnecessary and a little annoying. This shouldn't take anyone more than a couple of minutes to solve.

If you like having high quality metal puzzles in your collection then this is definitely a puzzle for you. It may have a relatively high cost for it's size, but I think that it is justified in the quality. However as a puzzle it is not difficult at all.

The Jigsaw Cube is currently available from Puzzle Master and Sloyd.
Related Posts Plugin for WordPress, Blogger...